|
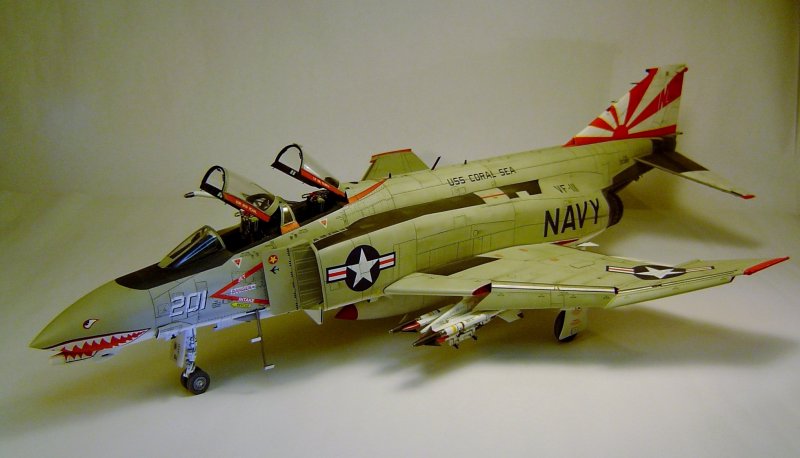
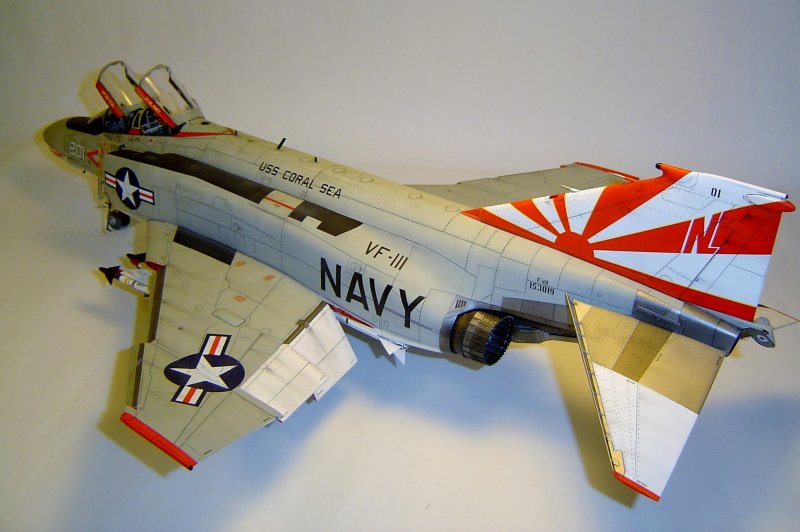
This is my seventh 1/32 scale Phantom II model, and I have to say that this was the most challenging build of them all. Since there are no "B" Phantom kits currently available, I went the conversion route using a Tamiya F-4J kit as the starting point. There are significant differences between a "B" Phantom and the "J" version, so there was a lot of additional work needed to make this build as accurate as possible.
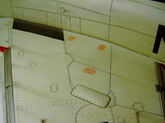
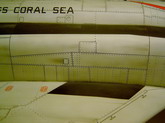
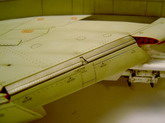
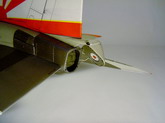
The biggest challenge for me was removing the bulge on the top and bottom sides of the wing that were part of the redesign to accommodate the thicker main gear wheels. My original plan was to use the upper wing pieces that are included
in the Cutting Edge F-4B conversion set. However, after inspecting the set's pieces, I realized that they were lacking rivet detail, the panel lines were inaccurate, and there was no wheel well detail on the underside. Instead, I modified the Tamiya wing pieces by removing the bulge with a Dremel tool, then rescribing any panel detail that was lost. This resulted in a VERY thin wing in several spots, and I had to reinforce the undersides with sheet plastic.
The airbrake and main gear door parts from the Cutting Edge kit were used to remove the lower wing bulge. The missing raised rivet detail on the inside of these pieces was replaced using Archer Transfer rivet decals.
|
Click on
images below to see larger images
|
|
|
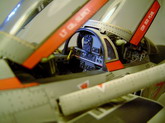
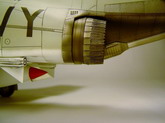
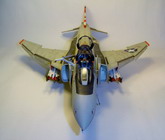
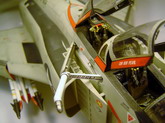
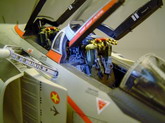
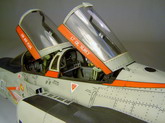
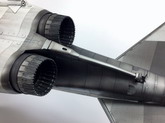
The nose pieces and fin cap are also from the Cutting Edge set. The rear cockpit control panel was reworked using scrap pieces from my photo-etch stash and parts from the kit. Aires ejection seats replaced the kit seats, and I used the Eduard Brassin USN Early Phantom exhaust set. Both of these sets are beautifully molded and are a significant upgrade to the kit pieces. The Master Model brass pitot tube and AOA probe set was also used.
In addition to the conversion work, the intakes were reworked using putty and latex paint to make them seamless. The leading edge flaps were cut off and repositioned in the down position. I scratch built the inboard flaps and used pieces from the Wolfpack Hard Wing Flap Down set for the outboard leading edge flaps.
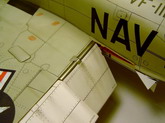
Additionally, the inboard trailing edge flaps were cut out and repositioned in the down position, and the additional detail on them was scratch built. The raised panels that Tamiya molded onto the fuselage, wings, and vertical stabilizer were all sanded off and rescribed. The anti-sway bolts on the wing pylons and TERs are fashioned from small segments of a guitar string, and the pads on the anti sway bolts are fashioned from the heads of pins.
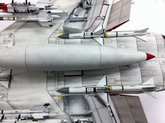
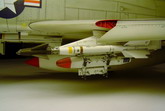
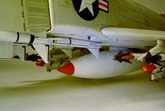
I used Cutting Edge's AIM-9D Sidewinders, as the kit's Sidewinders are not accurate for a Navy Phantom. I also had some leftover photo-etched pieces from and Eduard Phantom set, and these were used to display the drag chute door in the open position.
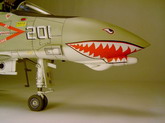
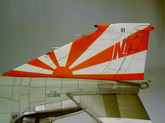
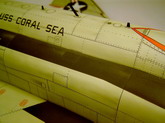
Model Master Dull Light Gull Grey were used to paint the upper surfaces, and I used Tamiya Flat White for the undersides. Additionally, Alclad was used for the bare metal surfaces on the tail and exhausts. Future was used as the gloss coat, and Zotz's F-4B Phantom Mig Killers decal were used for the VF-11 squadron markings. This Phantom was flown by Lt. Garry Weigand and LtJG. Bill Freckleton when they shot down a Mig-17 on March 6, 1972. It is depicted on the cover of Lou Drendel's book "...And Kill Migs" which I bought 40 years ago, and I've wanted to build it ever since. In hindsight, this subject is not very original, as this bird has been included in numerous articles on this site. I used Two Bobs AIM-7 Sparrow and AIM-9 Sidewinder decals for the missile markings. A black wash was applied to both accentuate the recessed panel lines and add weathering streaks. Alclad Semi-Matte Klear Kote was applied as the final coat to even things out.
Hope you enjoy!
John
"McCormick
|
Click on
images below to see larger images
|
|
|
|